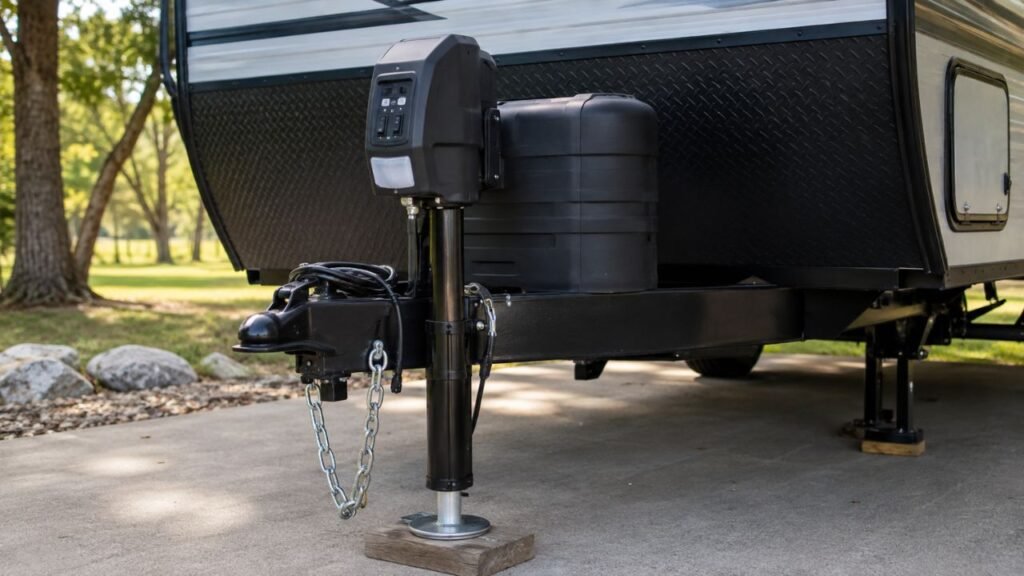
Your electric trailer jack usually clicks without moving because it receives enough power to activate the switch or relay, but not enough current to turn the motor. A weak battery, poor ground, corroded connection, overload, failed motor, or jammed screw mechanism may be responsible.
In this guide, I will help you check the easy problems first. We will then test the electrical system, try the manual override, identify mechanical binding, and decide whether repair or replacement makes more sense.
Key Takeaways
- A clicking sound means at least part of the circuit is responding.
- A weak battery is one of the most common causes.
- Corroded connections may pass voltage but restrict motor current.
- Painted or rusty mounting surfaces can create a poor ground.
- A jack may jam at full extension or full retraction.
- The manual override helps separate electrical and mechanical problems.
- Stop pressing the switch if the motor or wiring becomes hot.
- Support the trailer safely before removing or opening the jack.
What Does a Clicking Trailer Jack Actually Mean?
The clicking noise usually comes from a relay, switch, thermal breaker, or motor component attempting to engage. It confirms that something is receiving power, but it does not confirm that the motor has enough usable current.
An electric jack motor requires much more power than its light or relay. That is why the jack light may work normally while the lift mechanism remains completely still.
The type of clicking can also provide useful clues. One solid click often points toward a failed relay, weak connection, or stalled motor. Fast repeated clicking usually suggests severe voltage loss. A click followed by silence may indicate a breaker trip or mechanical bind.
Pay attention to where the sound comes from. A click near the battery may be coming from an inline breaker. A click inside the jack head may come from the direction switch, relay, or motor assembly.
Quick Diagnosis Based on the Sound and Symptoms
You can often narrow down the problem before removing anything. Match what your jack is doing with the symptoms below.
| Jack symptom | Most likely cause | First thing to check |
| One solid click with no movement | Weak battery, failed relay, or stalled motor | Battery voltage under load |
| Fast repeated clicking | Severe voltage drop | Battery terminals and ground |
| Motor hums but jack stays still | Jammed screw or damaged gears | Manual override |
| Jack works without trailer weight | Overload, weak motor, or internal friction | Jack rating and tongue weight |
| Jack works intermittently | Loose wire, corroded terminal, or failing switch | Wiring and switch connections |
| Jack light works but motor does not | High-current circuit problem | Main power and ground |
| Breaker clicks and resets | Overload, short, or mechanical jam | Wiring temperature and jack resistance |
| Jack stopped at full travel | Internal screw bound against its stop | Manual crank and travel position |
| Jack works in one direction only | Damaged directional switch or relay | Switch output and wiring |
| Jack grinds without lifting | Stripped or damaged gears | Gearbox and manual operation |
Most Common Reasons a Trailer Jack Clicks but Will Not Move
Electrical and mechanical failures can produce almost identical symptoms. Start with the power supply before assuming the jack needs internal repairs.
Weak or Discharged Trailer Battery
A weak battery may still operate the jack light and create a clicking sound. However, it may not supply the higher current needed to lift the trailer tongue.
This commonly happens after storage, cold weather, repeated jack use, or running other 12-volt equipment. An aging battery may also show acceptable voltage while resting but collapse when the jack motor starts.
A healthy, fully charged 12-volt battery commonly rests near 12.6 to 12.8 volts. The more useful test, however, is measuring voltage while pressing the jack switch. A sharp drop suggests a weak battery or high resistance in the circuit.
Charging the battery may temporarily restore the jack. If the problem returns quickly, the battery may need further testing or replacement.
Loose or Corroded Battery Connections
The jack motor needs a clean, low-resistance electrical path. A loose terminal may allow a small amount of power through, but it may block the heavy current required by the motor.
Inspect both battery terminals carefully. Look for white or green corrosion, loose nuts, damaged ring terminals, broken wire strands, and overheated insulation.
Do not stop after checking the battery posts. Follow the jack’s positive wire toward its fuse holder, breaker, connector, and motor housing. A connection can look secure while hiding corrosion underneath.
A hot terminal after a brief jack test is an important warning. Heat usually indicates resistance, looseness, corrosion, or an undersized connection.
Poor Ground Through the Trailer Frame
Many electric tongue jacks use their mounting plate and bolts as the negative ground connection. The electrical current passes from the jack housing through the mounting hardware and into the trailer frame.
Paint, rust, dirt, powder coating, sealant, or loose bolts can interrupt that path. The jack may still click, but the motor cannot complete the circuit properly.
Remove power before cleaning the mounting area. Make sure the bottom of the jack plate and the trailer frame have clean metal contact where required.
Serrated washers are often used to bite through coatings and improve grounding. However, they cannot correct severe corrosion or loose mounting hardware.
Some jacks use a dedicated negative wire instead. Check your jack’s wiring design before assuming the mounting plate provides the ground.
Blown Fuse or Failing Circuit Breaker
A completely blown fuse usually stops all jack activity. However, a damaged fuse holder or poor fuse contact may still create intermittent clicking.
Many trailer jacks also use an automatic-reset thermal breaker. When the jack draws too much current, the breaker opens. It may click again after cooling and resetting.
Repeated breaker cycling is not a repair. It usually means the jack is overloaded, mechanically jammed, shorted, or receiving power through a poor connection.
Always replace a fuse with the correct rating. Installing a larger fuse can overheat the wiring and create a serious fire risk.
Failed Switch, Relay, or Solenoid
A relay or solenoid can produce a clear click even when its internal contacts have failed. The low-current control side activates, but the high-current side does not send power to the motor.
Burned contacts may cause intermittent operation. The jack may work after several switch presses, stop under load, or operate in only one direction.
The directional switch can also fail internally. If the jack lowers but will not raise, or raises but will not lower, the switch or one side of the motor circuit deserves close attention.
A technician can test whether power leaves the switch and reaches the motor. If proper power and ground are present but the motor does not respond, the fault is likely inside the jack.
Damaged Power Wire
Trailer tongue wiring faces constant vibration, moisture, sunlight, and road debris. A wire may break internally even when its insulation looks normal.
Check areas where the wire bends sharply or passes through metal. Also inspect old crimp connectors, exposed splices, damaged heat-shrink tubing, and sections secured too tightly with zip ties.
Corrosion can travel underneath the insulation. If a wire feels stiff, swollen, discolored, or unusually warm, replacement may be safer than another temporary splice.
Pay special attention to the inline fuse holder. Water often enters inexpensive holders and corrodes the metal contacts inside.
Worn or Failed Electric Motor
A failing motor may click, hum, operate slowly, or stop whenever weight is applied. Worn brushes, damaged windings, overheated components, and internal corrosion can all reduce motor strength.
A motor can also develop a dead spot. The jack may suddenly begin working after vibration, a light tap, or manual movement. That temporary recovery does not mean the problem is solved.
If the manual override turns smoothly but the powered motor will not operate with proper voltage and ground, the motor or its internal control components are likely faulty.
Motor replacement may be possible on some models. On lower-cost or heavily corroded jacks, complete replacement may be more practical.
Jack Overloaded by Excessive Tongue Weight
A trailer jack lifts the trailer’s tongue weight, not its entire gross trailer weight. However, the required lifting force can rise during certain operations.
For example, some owners raise the coupled trailer and rear of the tow vehicle slightly while installing or removing weight-distribution spring bars. That can place much more load on the jack.
A jack rated too close to the actual working load may click or stall. Internal friction, low battery voltage, or an aging motor can make the problem worse.
Compare the jack rating with the trailer’s loaded tongue weight. Leave a reasonable capacity margin rather than choosing a jack that barely meets the expected load.
Jack Reached Its Full Travel Limit
Running the jack hard against full extension or full retraction can bind the internal traveling nut against a mechanical stop.
The motor may click because it cannot overcome the tight bind. The manual crank may also feel locked.
Avoid holding the switch after movement stops. The jack may not have an automatic limit switch, even if the motor sound changes near the end of travel.
Leaving a small amount of unused travel helps prevent binding. You can also mark a safe stopping point on the inner tube.
Internal Screw, Nut, or Gear Mechanism Is Jammed
Inside many electric tongue jacks, a long screw converts motor rotation into vertical movement. A traveling nut moves along that screw to extend or retract the tube.
Old grease may harden. Dirt and moisture may enter the housing. Bearings may corrode, gears may wear, or the screw may bind.
If the motor hums but the tube does not move, an internal mechanical problem becomes more likely. Grinding, popping, skipping, or metal particles inside the gearbox also indicate damage.
Do not open a jack while it supports the trailer. Transfer the weight to approved supports before removing or disassembling it.
Bent Inner Tube or Misaligned Jack
A jack can bend after an impact, sudden trailer movement, uneven loading, or side pressure. Even slight bending can cause the inner tube to bind inside the outer housing.
Look at the jack from the front and side. The tube should appear straight, and the foot should sit flat.
Loose mounting bolts can also let the jack lean under load. A damaged mounting plate may create similar binding.
Never use the jack to push or pull the trailer sideways. It is designed for vertical lifting.
Moisture, Dirt, or Rust Inside the Jack
The jack head sits at the front of the trailer, where it faces rain, road spray, dust, sunlight, and insects.
Moisture can corrode switches, motor terminals, gears, bearings, and relay contacts. Dust may mix with grease and create an abrasive paste inside the mechanism.
A fitted jack cover can reduce direct exposure while the trailer is parked. The cover should not trap moisture, and the jack should be allowed to dry before long-term storage.
How to Troubleshoot a Clicking Electric Trailer Jack
Start with simple external checks before opening the jack. This order helps you avoid unnecessary repairs and keeps the testing process safer.
Step 1: Secure the Trailer Before Testing
Before touching the wiring or mounting hardware, make sure the trailer cannot roll or drop.
- Park on solid, reasonably level ground.
- Chock the trailer wheels securely.
- Keep the trailer coupled to the tow vehicle when appropriate.
- Use approved jack stands if the tongue needs separate support.
- Keep hands away from the coupler and jack foot.
- Never rely on the faulty jack as the only support.
- Do not crawl beneath an unsupported trailer tongue.
Step 2: Inspect the Battery and Main Connections
Begin with a careful visual inspection. Many clicking jacks are fixed by correcting a loose or corroded connection.
Check these areas:
- Positive battery terminal
- Negative battery terminal
- Jack power wire
- Inline fuse holder
- Automatic circuit breaker
- Frame ground connection
- Jack mounting bolts
- Wire splices and connectors
Clean corrosion and tighten loose hardware. Replace damaged terminals instead of forcing them back into place.
A connection should be mechanically tight before it is protected with grease, sealant, or heat-shrink tubing.
Step 3: Measure Battery Voltage
Set a digital multimeter to DC voltage. Measure directly across the battery terminals before operating the jack.
A charged 12-volt battery should normally read above 12 volts while resting. A reading near 12.6 volts commonly indicates a strong charge, although battery type and temperature may affect the exact value.
Next, watch the meter while someone briefly presses the jack switch. A significant voltage collapse suggests a weak battery, poor battery connection, or excessive jack load.
Test directly at the battery posts, not only at the cable terminals. This helps you separate an internal battery issue from a terminal connection problem.
Step 4: Check for Voltage at the Jack
If the battery remains stable, test voltage at the jack’s power input while the switch is pressed.
Good voltage at the battery but low voltage at the jack indicates resistance between those points. Inspect the positive cable, fuse holder, breaker, splices, and connectors.
If correct voltage reaches the jack but it only clicks, check the ground path. After confirming both power and ground, suspect the switch, relay, motor, or internal mechanism.
Remember that an unloaded voltage reading can be misleading. Always test while the circuit is trying to operate.
Step 5: Test and Improve the Ground Connection
A temporary ground test can help confirm whether the mounting connection is faulty. Use an appropriate test lead only if you understand the jack’s wiring design.
For a frame-grounded jack:
- Disconnect the battery first.
- Remove rust and heavy paint from the grounding contact area.
- Clean the bottom of the mounting plate.
- Clean bolts, washers, and frame contact points.
- Reinstall the hardware evenly.
- Tighten all mounting bolts securely.
- Restore power and test the jack.
Do not remove more protective coating than necessary. Once the jack works correctly, protect exposed areas without insulating the electrical contact.
Step 6: Inspect the Fuse or Circuit Breaker
Remove the fuse and inspect both the fuse element and holder. A fuse may look intact while its terminals are corroded.
Use the fuse size recommended by the jack manufacturer. Never increase the rating to prevent repeated failures.
If the jack uses an automatic breaker, listen for a click after the switch is pressed. A breaker that repeatedly trips may be responding to excessive current.
Check for hot wires, shorted insulation, a stalled motor, or a mechanical jam before replacing the breaker.
Step 7: Reduce the Load on the Jack
A jack that works without weight but stalls under load may be overloaded or weak.
Safely transfer the tongue weight to the tow vehicle, a properly rated bottle jack, or approved supports. Only lift from a structural point recommended for the trailer.
After unloading the electric jack, test it again briefly.
If it begins working, the likely causes include excessive load, a weak battery, voltage loss, motor wear, or internal friction.
Do not treat unloaded operation as proof that the jack is healthy. It should operate reliably under its intended working load.
Step 8: Try Both Switch Directions Briefly
When the jack is stuck near full travel, a very brief command in the opposite direction may release the bind.
Press the switch for only a moment. Stop immediately if the jack continues clicking without movement.
Do not repeatedly alternate the switch. That can overheat the motor, relay, breaker, and wiring.
If the jack releases, move it away from the travel limit. Mark the tube so you can stop earlier next time.
Step 9: Test the Manual Override
The manual crank is one of the most useful diagnostic tools. It helps you determine whether the problem is electrical or mechanical.
Remove the manual override cover and use the correct crank or socket. Confirm the proper turning direction in the jack instructions.
The result can tell you a lot:
- The crank turns smoothly: The problem is likely electrical.
- The crank is extremely difficult to turn: The screw may be jammed or corroded.
- The crank turns but the tube stays still: Internal gears may be stripped.
- The crank will not turn near full travel: The screw nut may be bound against its stop.
- The crank moves only after unloading the jack: Excessive load or internal wear may be present.
Do not use a long breaker bar to force a locked mechanism. Excessive force can damage gears, shear pins, or bend the screw.
Step 10: Inspect for Bending or Physical Damage
Look closely at the jack body, mounting plate, inner tube, foot, and drop leg.
Watch for:
- A bent inner tube
- A crooked jack foot
- A damaged drop-leg pin
- Loose mounting bolts
- A cracked mounting plate
- Impact marks
- Uneven extension
- Side pressure against the jack
- Binding at one repeatable position
A visibly bent jack should normally be replaced. Straightening a load-bearing tube may weaken it or leave hidden damage.
Step 11: Let an Overheated Jack Cool Down
Repeated lifting cycles can overheat the motor or activate thermal protection.
Stop using the jack and allow it to cool. Do not pour water over the motor housing.
If operation returns after cooling, the jack may be overloaded, worn, poorly lubricated, or receiving reduced voltage.
Frequent overheating is a warning, not normal operation. Find the cause before relying on the jack again.
How to Tell Whether the Problem Is Electrical or Mechanical
The manual override, voltage testing, and sound pattern can help you identify which side of the jack has failed.
Signs of an Electrical Problem
- Rapid clicking from a relay or breaker
- Jack light dims when the switch is pressed
- Manual crank moves the jack normally
- Jack works after charging the battery
- Operation changes when a wire is moved
- Jack works in only one direction
- Battery voltage drops sharply
- Electrical terminals become hot
- Corrosion is visible around connectors
- Correct movement returns after cleaning the ground
Signs of a Mechanical Problem
- Motor hums but the tube does not move
- Manual crank feels locked
- Jack stopped at full extension or retraction
- Grinding or popping comes from the gearbox
- The tube looks bent
- Jack binds at the same height
- Metal particles appear in the grease
- Motor stalls even with a strong battery
- Jack works only after its load is removed
- Crank turns but does not move the inner tube
What to Do When the Jack Is Stuck Fully Retracted
A fully retracted jack may have pulled its internal traveling nut tightly against the upper stop. The motor may click because it cannot reverse the bind.
Keep the trailer attached to the tow vehicle if that provides safe support. Confirm the correct manual crank direction before turning anything.
Try a controlled manual movement away from the stop. Use steady pressure rather than sharp impacts.
If the crank will not move with reasonable force, stop. Forcing it may damage the gears or screw.
A severely jammed jack may need to be removed and repaired on a workbench. Since a low-cost jack can require significant labor to rebuild, replacement may be more practical.
After installing or freeing the jack, avoid retracting it completely. Leave a small visible section of travel and mark that safe position.
What to Do When the Jack Is Stuck Fully Extended
A jack stuck in the extended position requires careful weight transfer before removal.
First, chock the wheels and stabilize the trailer. Couple the trailer to the tow vehicle when possible.
A properly rated bottle jack may be used at an approved structural lifting point. Never place it beneath thin sheet metal, tanks, plumbing, floor panels, or underbelly material.
Raise the tongue only enough to remove weight from the electric jack. Add approved jack stands or solid support as required.
Once the failed jack is unloaded, try the manual override again. You can also inspect the mounting bolts, wiring, and tube alignment.
Do not remove the jack mounting bolts until the trailer tongue is fully supported by another system.
Can You Power the Jack From the Tow Vehicle?
Connecting the tow vehicle may provide charging current to the trailer battery, but it may not immediately solve the problem.
The trailer connector usually provides limited charging current. It may take time to raise a discharged battery voltage.
A corroded connector, damaged charge wire, poor ground, or blown vehicle fuse may also prevent useful power from reaching the trailer.
For testing, a properly charged trailer battery is more reliable. You may also use an approved external 12-volt power source that can safely supply the required current.
Do not connect random chargers, jump packs, or power supplies without confirming voltage, polarity, and current capability.
The jack should still have a secure ground path. Additional positive power will not fix a poor ground.
Should You Keep Pressing the Switch When It Only Clicks?
No. Stop after a few brief tests.
Repeatedly pressing the switch can overheat the motor, drain the battery, burn relay contacts, damage the breaker, or melt a weak connection.
It may also tighten a mechanical bind if the jack is already against its travel limit.
Disconnect power immediately if you notice smoke, melting insulation, a burning smell, sparks, or unusually hot wiring.
A clicking jack is giving you a warning. Find the cause instead of trying to force it through repeated switch presses.
Can You Fix a Jammed Trailer Jack at the Campsite?
Some trailer jack problems are easy to correct at a campsite. A loose battery terminal, corroded ground, blown fuse, or weak battery may only require basic tools.
A minor travel-limit bind may also release with careful manual operation.
Internal problems are different. A seized screw, broken gear, bent tube, failed bearing, or damaged motor may require a vise, workbench, replacement parts, and proper lifting equipment.
Opening a grease-filled gearbox at the campsite can also create a difficult mess. Small clips, washers, and gear parts are easy to lose.
Most importantly, never disassemble a jack while it supports the trailer. Stabilize the tongue and transfer its weight first.
If you cannot support the trailer safely, call for professional assistance. Protecting the trailer and everyone nearby matters more than completing a quick repair.
When Should You Repair or Replace the Trailer Jack?
Minor electrical faults are often worth repairing. Major structural damage or multiple internal failures usually make replacement the safer choice.
| Condition | Repair may make sense | Replacement may be better |
| Loose or corroded connection | Yes | Usually unnecessary |
| Damaged fuse holder | Yes | If nearby wiring is also damaged |
| Worn directional switch | Often | If replacement parts are unavailable |
| Failed motor | If the motor is replaceable | If the jack is old or badly corroded |
| Stripped gears | If a rebuild kit is available | If several internal parts are damaged |
| Bent inner tube | Rarely | Usually recommended |
| Seized screw mechanism | Possible with proper tools | Often more practical |
| Water-damaged housing | If corrosion is limited | If corrosion is widespread |
| Undersized jack | Repair will not fix capacity | Upgrade to a stronger jack |
| Repeated overheating | After correcting the cause | If the motor is permanently damaged |
| Cracked mounting plate | Welding may be possible professionally | Replacement is often safer |
| Older low-cost jack | Repair may exceed its value | Replacement is often economical |
Before buying parts, compare the repair cost with the price of a complete replacement. Include the value of your time and the risk of another failure during travel.
How to Choose the Correct Replacement Jack
A replacement jack should fit the trailer physically and provide enough capacity for real-world use. Do not choose one based only on the lowest price.
Match the Jack to the Tongue Weight
The jack capacity should comfortably exceed the trailer’s loaded tongue weight.
Tongue weight changes after loading propane, batteries, camping equipment, water, and cargo. Use the loaded figure rather than an empty-trailer estimate.
A larger rating does not mean the jack lifts the trailer’s full gross weight. It simply provides more working margin at the tongue.
That margin can help the motor work with less strain and may extend its service life.
Consider Weight-Distribution Hitch Use
Some owners use the tongue jack to lift the coupled truck and trailer slightly. This reduces pressure on weight-distribution spring bars during installation or removal.
That process can increase the load on the jack. A unit that handles normal tongue weight may struggle during hitch adjustments.
Choose a jack with enough working capacity for the way you actually use your trailer.
Still follow the weight-distribution hitch manufacturer’s instructions. Do not lift higher than necessary.
Check Lift Range and Retracted Height
The jack must fit your trailer and provide the required travel.
Check these measurements:
- Coupler height when level
- Ground clearance while towing
- Retracted jack height
- Total lifting travel
- Drop-leg adjustment range
- Foot size
- Tailgate clearance
- Propane cover clearance
- Weight-distribution setup height
A drop leg can reduce the amount of powered travel needed. That may shorten operating time and reduce motor heat.
Compare Grounding and Wiring Designs
Some jacks use a single positive wire and ground through the mounting plate. Others use dedicated positive and negative wires.
A dedicated ground wire may provide a more consistent electrical path, especially on painted or heavily coated frames.
Look for sealed connectors, accessible fuse protection, suitable wire size, and clear installation instructions.
The replacement should also match your trailer’s electrical system voltage.
Look for Useful Protection Features
Helpful features may improve reliability and daily use.
- Manual override
- Automatic stopping system
- Thermal motor protection
- Weather-resistant switches
- Sealed motor housing
- Built-in LED light
- Adjustable drop leg
- Accessible fuse or breaker
- Available replacement parts
- Clear warranty coverage
- Removable foot plate
- Visible travel markings
A remote control can be convenient, but reliability, capacity, and parts support should come first.
How to Prevent Your Trailer Jack From Jamming Again
A few simple habits can reduce strain on the motor, gears, wiring, and screw mechanism.
- Stop before full extension.
- Stop before full retraction.
- Mark safe stopping points on the inner tube.
- Keep the trailer battery charged.
- Test the battery before long trips.
- Clean battery terminals regularly.
- Inspect the mounting ground for rust.
- Tighten jack mounting bolts periodically.
- Protect the jack head from direct rain.
- Keep road salt and dirt off the tube.
- Do not exceed the jack rating.
- Avoid lifting the trailer sideways.
- Use the drop leg to reduce powered travel.
- Allow the motor to cool between repeated cycles.
- Lubricate only approved service points.
- Keep the manual crank inside the trailer or tow vehicle.
- Test the jack before leaving home.
- Carry wheel chocks and a rated backup jack.
- Inspect the foot and retaining pin for bending.
- Stop immediately when the jack sound changes.
Do not spray random lubricant into the motor housing or electrical switch. Some products attract dirt or damage plastic and electrical components.
Follow the jack manufacturer’s lubrication instructions whenever they are available.
Tools That Make Trailer Jack Troubleshooting Easier
You do not need a full repair shop to complete the basic checks.
- Digital multimeter
- Battery charger
- Battery terminal brush
- Wire brush
- Socket and wrench set
- Manual override crank
- Correct replacement fuses
- Electrical contact cleaner
- Heat-shrink connectors
- Crimping tool
- Work light
- Wheel chocks
- Rated jack stands
- Properly rated bottle jack
- Work gloves
- Eye protection
Keep the emergency tools somewhere accessible. A manual crank stored in a locked compartment may not help when the jack is holding that compartment closed.
Trailer Jack Safety Mistakes to Avoid
The trailer tongue carries enough weight to cause serious damage. Avoid shortcuts, even when you are trying to leave a campsite quickly.
- Do not crawl under an unsupported trailer tongue.
- Do not remove a loaded jack.
- Do not install a larger fuse.
- Do not bypass a breaker permanently.
- Do not force a locked manual crank.
- Do not reverse electrical polarity.
- Do not use damaged extension wiring.
- Do not place a bottle jack under thin panels.
- Do not use unstable stacked blocks as primary support.
- Do not continue operating hot wiring.
- Do not open the gearbox while the jack carries weight.
- Do not place hands near the coupler during lifting.
- Do not assume the LED light proves the battery is healthy.
- Do not strike the inner tube while it is loaded.
- Do not use the jack to move the trailer sideways.
When the trailer cannot be stabilized safely, stop and seek professional assistance.
Final Verdict
A trailer jack that clicks but does not move usually has low available current, a poor ground, a failed high-current component, too much load, or an internal mechanical jam.
Begin with the trailer battery, terminals, fuse, breaker, wiring, and mounting ground. These are the easiest problems to inspect and the most affordable to correct.
Next, test the manual override. A freely turning crank usually points toward an electrical fault. A locked or difficult crank usually points toward mechanical binding.
Replace the jack when the tube is bent, the screw is severely seized, the gears are badly damaged, or corrosion has spread through the motor and housing. A reliable replacement is often safer than depending on a questionable repair.
Most importantly, do not keep forcing the switch. Support the trailer correctly, work through the checks calmly, and you will usually find the cause without making the problem worse.
Related FAQs
These quick answers cover several common questions that come up when an electric trailer jack clicks but refuses to move.
Why Does My Trailer Jack Click Repeatedly?
Repeated clicking usually indicates low battery voltage, a poor ground, a loose terminal, or a thermal breaker that keeps tripping and resetting under excessive current.
Why Does My Jack Light Work but the Motor Does Not?
The jack light requires much less current than the motor, so a weak battery or resistant connection may power the light while preventing the motor from turning.
Can a Bad Ground Make a Trailer Jack Click?
Yes. A poor ground can allow the switch or relay to click while restricting the heavier current needed by the jack motor.
How Do I Know if My Trailer Jack Motor Is Bad?
If the jack receives proper voltage and ground, the manual crank moves freely, and the powered motor still does not run, the motor or its internal controls may have failed.
Why Does My Trailer Jack Work Only Without Weight?
The jack may be overloaded, receiving low current, suffering from motor wear, or developing internal friction that becomes worse under tongue weight.
Can a Trailer Jack Get Stuck at Full Extension?
Yes. Running the jack against its full mechanical limit can bind the traveling nut against an internal stop and prevent powered or manual movement.
Can I Manually Lower an Electric Trailer Jack?
Most electric trailer jacks include a manual override, but you should confirm the correct tool and turning direction before applying force.
Can I Replace Only the Trailer Jack Motor?
Some jack models offer replacement motors, switches, gears, and covers, while sealed or inexpensive models may be more economical to replace completely.
How Long Should an Electric Trailer Jack Last?
Service life depends on load, weather exposure, maintenance, wiring condition, frequency of use, and whether the jack is repeatedly driven against its travel limits.
Should I Lubricate an Electric Trailer Jack?
Use only the lubrication points and products recommended for your model, since unsuitable grease may attract dirt or damage internal materials.
Why Does My Trailer Jack Work in One Direction Only?
A jack that moves in only one direction may have a failed directional switch, damaged relay contact, loose wire, or one damaged side of the motor circuit.
Can a Weak Battery Damage an Electric Trailer Jack?
A weak battery can create low voltage and higher operating strain, causing relay chatter, motor heat, slow movement, and premature wear if operation continues.
Should I Replace a Jack With Stripped Gears?
Gear replacement may work when a correct rebuild kit is available, but replacement is usually better when the screw, motor, bearings, or tube are also damaged.
Can Rain Make an Electric Trailer Jack Stop Working?
Yes. Water can enter the switch, motor housing, connectors, or gearbox and cause corrosion, electrical resistance, or mechanical binding.
Can I Use a Bottle Jack to Support the Trailer Tongue?
You can use a properly rated bottle jack at an approved structural lifting point, but you should also stabilize the trailer and never rely on the bottle jack alone during repairs.

Scott Miller shares real-world RV road trip insights built from years of traveling open highways and backroads. He covers route planning, campground choices, and travel gear with a practical mindset. His content is written for RVers who value reliability over trends.