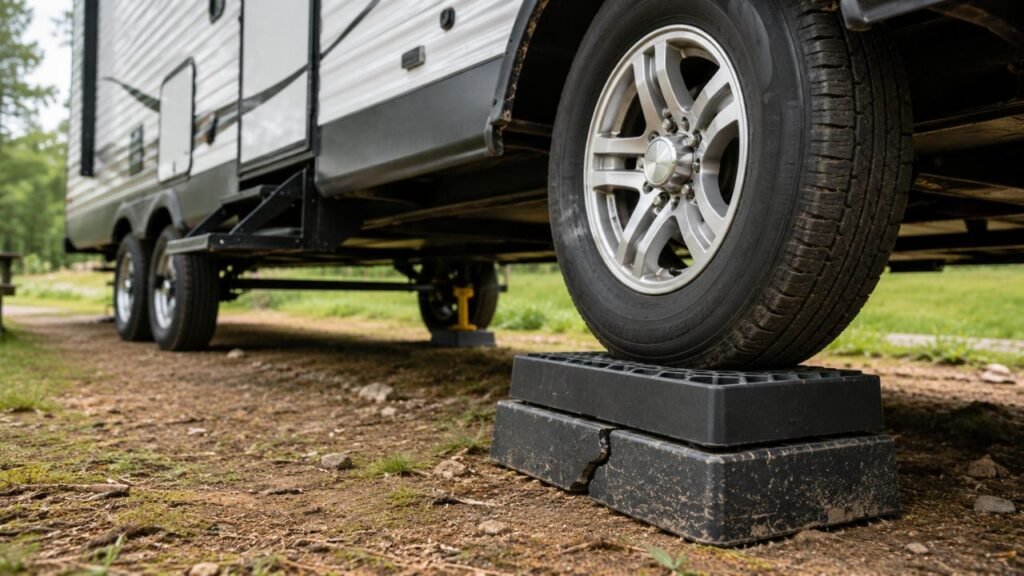
Leveling blocks usually crack because the RV’s weight gets concentrated on a small, unsupported area. Uneven gravel, poor stacking, edge-loaded tires, overloaded blocks, cold temperatures, and aging plastic can all create enough stress to split or break them.
If your blocks keep cracking, the solution is not always buying thicker ones. I’ll show you how to identify the actual cause, place them correctly, prevent repeat failures, and know when a damaged block needs replacing.
Key Takeaways
- Uneven ground can create concentrated pressure underneath leveling blocks.
- Rocks and large gravel should be removed before placing blocks.
- Tires should sit securely within the block’s supported area.
- Small jack feet can put excessive pressure on plastic blocks.
- Cold temperatures may make some plastic blocks more brittle.
- Tall or uneven stacks increase movement and cracking risk.
- Always stay within the block manufacturer’s load rating.
- Replace structurally cracked blocks instead of trying to repair them.
Why Do Leveling Blocks Crack?
Most leveling blocks do not suddenly crack just because an RV is heavy. Usually, something causes that weight to become concentrated instead of spreading evenly across the block.
Uneven Ground Creates Pressure Points
This is one of the most common causes I would check first.
Imagine placing a leveling block over one large piece of gravel. Most of the block sits slightly above the ground, while that stone pushes upward against one small section.
Once the RV tire rolls onto it, tremendous pressure develops around that point.
The block begins flexing around the stone. Plastic leveling blocks are designed to carry compression loads, but excessive bending can eventually cause them to split.
Sticks, roots, broken concrete, and hard dirt ridges create similar problems.
Before laying your blocks down, run your hand or boot across the area. Remove anything that could create an obvious high spot underneath them.
The RV Is Too Heavy for the Blocks
Leveling blocks have limits just like other RV equipment.
A lightweight travel trailer might place considerably less load on them than a large fifth wheel or motorhome.
Problems become more likely when blocks designed for lighter RVs are repeatedly used beneath heavier vehicles.
However, you should not compare the block rating directly with your RV’s total weight.
The vehicle’s weight is distributed between several tires and axles. The amount reaching one block depends on the RV’s configuration and how it is loaded.
Your safest approach is simple. Check the manufacturer’s load specifications and confirm the blocks are suitable for your particular RV.
The Tire Is Sitting on the Edge
Tire position matters more than many RV owners realize.
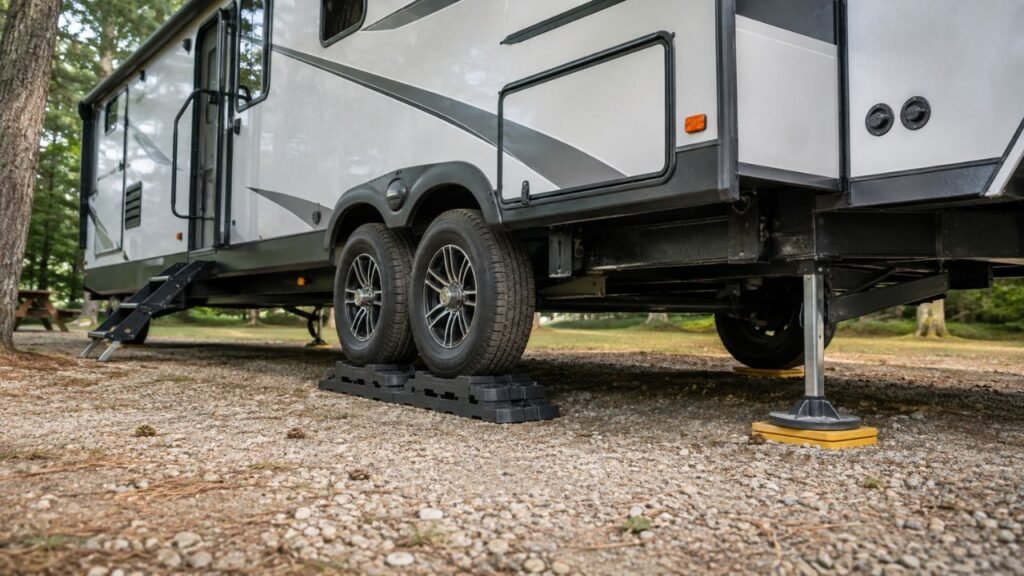
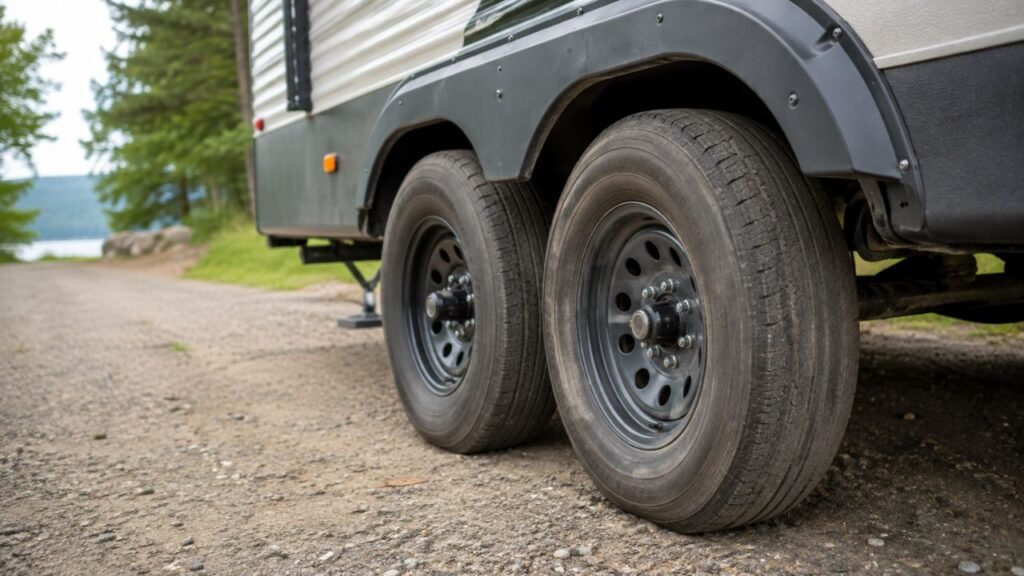
When your tire sits near the center, the block can distribute the load through its reinforced structure.
Move that tire toward the outer edge, however, and things change.
Now the load may be concentrated around a weaker unsupported section. The edge can begin bending downward until a crack forms.
This becomes especially important when backing onto blocks. It can be difficult to see exactly where the tire ends up.
After positioning your RV, step outside and inspect the tire placement.
If the tread is hanging noticeably beyond the supported area, reposition the RV instead of leaving it that way.
A Jack Foot Is Too Small
A small contact area can create surprisingly high pressure.
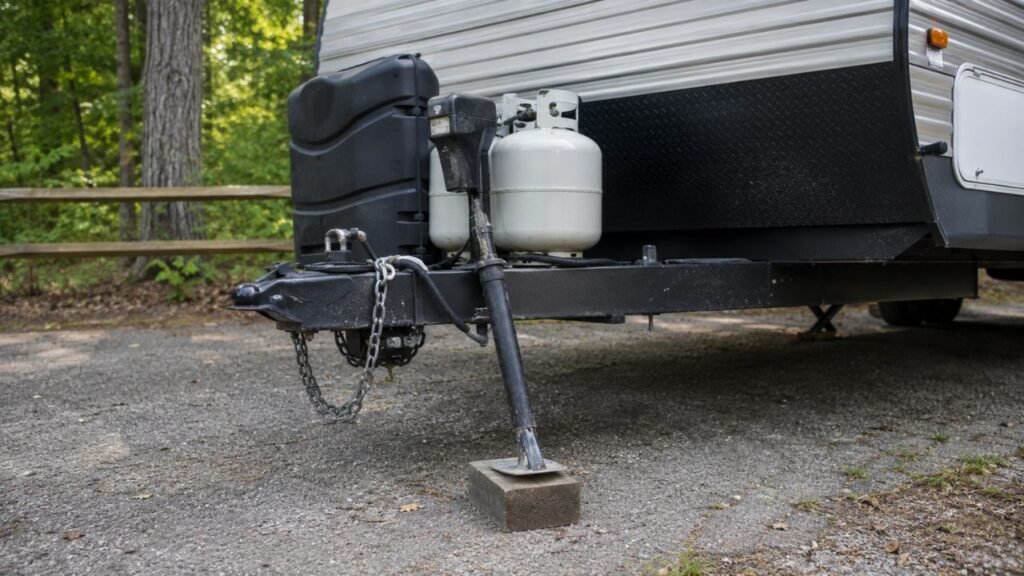
Your tongue jack, landing gear, or leveling jack may carry substantial weight through a relatively small foot.
If you place that foot directly on a lightweight plastic block, all that force becomes concentrated within a small section.
The result may be a round indentation, broken internal ribs, or a crack running outward from the jack foot.
Where appropriate, use a proper jack pad designed to spread that load over a larger area.
Also confirm the leveling block manufacturer approves that block for jack use.
The Blocks Were Stacked Incorrectly
Stackable leveling blocks work best when they support each other as intended.
Problems begin when blocks are:
- Misaligned between layers.
- Balanced over unsupported gaps.
- Mixed with incompatible block designs.
- Stacked into narrow towers.
- Positioned with corners hanging unsupported.
A poorly built stack forces individual sections to carry loads they were not designed to handle.
The bottom layer is particularly important.
If that foundation moves or flexes, every layer above it can move too.
Build the stack according to the manufacturer’s recommended pattern whenever possible.
Cold Weather Makes Plastic More Brittle
Cold conditions can change how some plastics behave.
At warmer temperatures, a plastic block may flex slightly when loaded. At colder temperatures, that same material may become less forgiving.
That does not mean your leveling blocks will automatically shatter during winter camping.
Trouble is more likely when cold temperatures combine with another problem.
For example, a cold block sitting over a sharp rock may experience both brittleness and concentrated pressure.
Existing damage can make the situation worse.
During cold-weather trips, inspect your blocks carefully and avoid driving onto them aggressively.
Sunlight and Age Weaken the Plastic
RV leveling blocks spend a lot of their lives outdoors.
Sunlight, temperature changes, dirt, moisture, and repeated loading gradually affect plastic components.
Older blocks may start looking:
- Faded.
- Chalky.
- Warped.
- Discolored.
- Brittle around the edges.
These changes do not always mean immediate failure. However, they are good reasons to inspect the blocks more carefully.
I would pay particular attention to the structural ribs underneath.
Small fractures around those ribs may eventually develop into larger cracks.
Driving Onto the Blocks Too Aggressively
Leveling blocks are designed to support your parked RV. They should not regularly absorb harsh impacts.
Driving onto them quickly creates additional forces.
The situation becomes worse if the tire:
- Spins while climbing.
- Hits the block sideways.
- Suddenly stops near the top.
- Pushes the stack across gravel.
- Drops heavily onto another block.
Approach your leveling ramp slowly.
Smooth tire movement gives the blocks time to support the load without unnecessary impact.
What Actually Happens When a Leveling Block Cracks?
A leveling block usually fails when one section flexes more than the surrounding material.
Your RV pushes downward while the ground pushes upward. When those forces spread evenly, the block handles them much better.
Put one large stone underneath the center, however, and the situation changes.
The stone supports one small area while surrounding sections remain unsupported. The block bends around that spot.
Tiny stress marks may develop first. Repeated loading can then turn those marks into visible fractures.
The same thing happens when a tire sits partly over an unsupported edge.
That is why good ground preparation often matters just as much as block strength.
Where Leveling Blocks Usually Crack
The location of the damage can sometimes tell you what went wrong. Before throwing the block away, take a quick look at where the fracture started.
- Around the outside edge: The tire may have been positioned too close to the edge.
- Across the middle: There may have been a rock or unsupported hollow underneath.
- Around interlocking tabs: The stack may have shifted or been poorly aligned.
- Under a jack foot: Too much weight may have been concentrated in one area.
- Around an old scratch: Previous damage may have created a weak point.
- Near faded plastic: Long-term exposure may have reduced the material’s toughness.
- Along structural ribs: Uneven support or overloading may have stressed the reinforcement.
You may find more than one cause.
For example, an older block can survive normal use but crack once placed over sharp gravel.
Can Leveling Blocks Crack From Too Much Weight?
Yes, excessive weight can crack leveling blocks. However, poor weight distribution often causes trouble before total RV weight does.
Think about the difference between standing on snow with boots and snowshoes.
Your body weight stays the same. The larger surface simply spreads that weight over more ground.
Leveling blocks work under a similar principle.
A properly supported tire spreads its load across much of the block. A small jack foot concentrates that load in one place.
You should also remember that RV weight is not perfectly equal everywhere.
Water tanks, batteries, appliances, slide-outs, and cargo can make one side heavier.
Do not guess whether your blocks are strong enough.
Compare your setup with the manufacturer’s stated limits and intended applications.
Can Gravel Cause RV Leveling Blocks to Crack?
Yes, gravel can contribute to cracked leveling blocks, especially when the stones are large, loose, or sharp.
Fine, well-compacted gravel usually provides better support than scattered rocks.
The main problem is uneven contact.
Suppose four corners of the block are supported while the center sits over a depression. When your tire drives onto it, the center can flex downward.
The opposite situation also causes trouble.
One large stone directly underneath can push upward while the remaining block bends around it.
Before setting up on gravel, kick away larger stones and create the flattest area reasonably possible.
You are not trying to make the campsite perfectly smooth. You simply want the block supported across as much of its underside as possible.
Does Cold Weather Make Leveling Blocks Crack?
Cold weather can increase the cracking risk of some plastic leveling blocks because certain plastics become less flexible as temperatures fall.
You may never notice this under perfect conditions.
However, cold weather becomes important when combined with rough ground, existing damage, excessive loading, or sudden impacts.
For example, quickly driving a heavy motorhome onto an older block during freezing weather creates very different stresses than slowly positioning a small trailer during summer.
Give cold leveling blocks an extra inspection before using them.
If you notice cracks, missing corners, or unusually brittle edges, retire that block.
Leveling Block Material and Cracking Risk
Different leveling materials behave differently under load. None is automatically perfect, so consider durability, weight, storage, and your RV’s requirements before choosing one.
| Leveling Block Type | Main Advantage | Main Weakness | Cracking Risk | Typical Use |
| Plastic interlocking blocks | Lightweight and easy to stack | Can flex over uneven ground | Moderate if poorly supported | Travel trailers and many RVs |
| Heavy-duty reinforced plastic | Stronger construction | Usually heavier and costlier | Lower with proper placement | Larger RVs and frequent campers |
| Rubber pads | Flexible with good grip | Provides limited leveling height | Very low cracking risk | Jacks and ground protection |
| Wood blocks | Affordable and easy to replace | Can split, rot, or absorb moisture | Wood may split instead | Occasional leveling |
| Composite blocks | Durable and weather resistant | Quality varies between products | Low to moderate | Frequent RV leveling |
Do not choose based on material alone.
A strong block positioned badly can still fail. Likewise, an appropriately rated lightweight block may last years when properly supported.
How Should Leveling Blocks Be Placed to Prevent Cracking?
Proper placement does not require complicated equipment. A few extra seconds preparing the surface can greatly reduce unnecessary stress.
- Inspect the area where your low-side tire will sit.
- Remove large rocks, sticks, and sharp debris.
- Find the flattest practical section of ground.
- Determine how much leveling height you need.
- Build your stack using the intended interlocking pattern.
- Make sure every lower block is properly supported.
- Approach the blocks slowly and as straight as possible.
- Keep the tire within the supported leveling area.
- Chock your RV according to your normal safe setup.
- Inspect the stack once the RV has settled.
I also recommend looking underneath the blocks when you pack up.
Fresh stress marks can warn you about a setup problem before the block completely fails.
How High Can You Safely Stack RV Leveling Blocks?
There is no universal number of leveling blocks that can safely be stacked.
Different products use different shapes, locking systems, ramps, and load ratings.
A configuration approved by one manufacturer might be inappropriate for another.
As the stack gets higher, stability becomes increasingly important.
Tall stacks can:
- Shift while the tire climbs.
- Create steeper approach angles.
- Place sideways force on locking tabs.
- Become unstable on soft ground.
- Leave lower blocks unevenly supported.
I would avoid improvising a tall tower simply because you have extra blocks available.
Follow the stacking configuration intended for your specific leveling system.
If the campsite requires extreme leveling, repositioning the RV may be safer and easier.
Should the Entire RV Tire Sit on the Leveling Block?
Your tire should be securely supported within the usable area specified for the leveling system.
You do not want a substantial part of the tread hanging unsupported over an edge.
Poor tire positioning increases stress on both the block and tire.
This becomes especially important with dual-wheel motorhomes.
Do not assume supporting only one tire of a dual setup is automatically acceptable. The correct support arrangement depends on your leveling product and vehicle configuration.
When you are unsure, use a leveling solution wide enough for proper tire support and follow the manufacturer’s instructions.
Can You Put Leveling Blocks Under Stabilizer Jacks?
Some leveling blocks can be used beneath jacks, but you should not assume every plastic tire block can safely handle a concentrated jack load.
There is also an important distinction between different RV jacks.
Leveling jacks can carry significant vehicle weight.
Tongue jacks support the front of travel trailers.
Stabilizer jacks mainly reduce movement after the RV has been leveled. They should not normally be used to lift and level a trailer unless specifically designed for that purpose.
A jack also places its force through a much smaller contact area than a tire.
For that reason, a purpose-made jack pad may be better underneath the jack.
Always verify that your chosen block is rated and intended for that application.
Why Do My Leveling Blocks Keep Breaking in the Same Spot?
If you repeatedly break blocks in the same position, something about your setup probably needs attention. Replacing the block without finding the cause may simply lead to another failure.
Check the Ground Under the Broken Block
Start with the simplest possibility.
Move the damaged block and inspect the exact surface underneath.
Look for:
- A large rock.
- Hard gravel.
- Tree roots.
- Concrete edges.
- Deep depressions.
- Soft spots.
Repeatedly parking in the same campsite position can put blocks over the same troublesome surface each time.
Check Tire Position
Look at where the tire sits compared with the fracture.
If the same block edge keeps breaking, your tire may consistently end up too close to that side.
Use a spotter if positioning is difficult.
A small correction before parking can prevent a large amount of stress.
Check the RV’s Weight
Your blocks may simply be too lightly built for your current RV.
This sometimes happens after upgrading from a smaller trailer while continuing to use old leveling equipment.
Also consider changes you have made to the RV.
Additional batteries, full tanks, generators, cargo, and accessories all add weight.
Check Your Stacking Pattern
Look closely at how the blocks interlock.
A block should not be bridging an unsupported opening unless the system was specifically designed that way.
Misaligned tabs can also prevent surfaces from sitting flat.
Rebuild the stack rather than forcing pieces together.
Check the Other Blocks for Damage
One damaged block can affect the entire stack.
A warped bottom block may cause the block above it to sit unevenly. That transfers more pressure into a smaller area.
Inspect every piece instead of replacing only the visibly broken one.
How Can You Tell a Leveling Block Is Starting to Fail?
Blocks often show warning signs before completely breaking. Give them a quick inspection while setting up and packing away.
Look for:
- Hairline fractures.
- White stress marks in colored plastic.
- Bent reinforcing ribs.
- Broken locking tabs.
- Warped surfaces.
- Missing corners.
- Deep scratches or gouges.
- Chalky or brittle plastic.
- Blocks that no longer sit flat.
- Pieces that no longer interlock correctly.
Turn each block over during inspection.
Damage underneath is easy to miss because that surface normally stays against the ground.
Is It Safe to Use a Cracked Leveling Block?
I would not trust a structurally cracked leveling block beneath an RV.
Once the block has cracked, you cannot reliably know how much strength remains.
The fracture might stay unchanged during one trip and suddenly spread during the next.
Replacing the damaged block is much safer than experimenting under several thousand pounds of vehicle weight.
I would also avoid repairs involving glue, tape, screws, or melted plastic.
Those methods might hold the pieces together, but they do not restore the original engineered load capacity.
A damaged leveling block is inexpensive compared with damage caused by an unstable RV.
What Should You Do If a Leveling Block Cracks Under Your RV?
Do not rush underneath the vehicle when you notice a broken block. Your priority is removing the load safely before touching the damaged piece.
- Keep people away from the affected area.
- Do not reach beneath the loaded tire or jack.
- Secure the RV using appropriate wheel chocks.
- Retract equipment as required by your RV’s leveling procedure.
- Carefully move or lift the load away from the damaged block.
- Remove the broken pieces only after the area is unloaded.
- Inspect every neighboring block for stress damage.
- Prepare and flatten the ground again.
- Install an undamaged, appropriately rated block.
- Reposition and inspect the complete setup.
Never crawl beneath an RV supported only by leveling blocks or leveling jacks.
If you cannot safely unload the damaged block, get qualified assistance instead of improvising underneath the vehicle.
How to Stop Leveling Blocks From Cracking
You cannot eliminate every possibility of block damage. However, the following habits address most of the preventable causes I see.
Start With Flat Ground
Look down before building your stack.
Removing one sharp rock can make a bigger difference than adding another block.
You want the bottom surface supported as evenly as practical.
Match the Blocks to Your RV Weight
Do not treat every plastic leveling block as interchangeable.
Use a product designed for your type and size of RV.
Pay close attention when using blocks with larger motorhomes, fifth wheels, and heavily loaded trailers.
Keep Tires Centered
Drive onto the blocks slowly enough to stop in the correct position.
If you overshoot, reposition the RV rather than accepting poor support.
Your tire should not be hanging significantly over the outer edge.
Use Larger Jack Pads
A wider jack pad spreads the load across more surface area.
That can reduce concentrated pressure on both the leveling block and ground.
Make sure any combination of pads and blocks remains stable and approved for the application.
Build Wide, Stable Stacks
Avoid narrow towers.
A broader base usually provides better support and reduces movement.
Use the interlocking pattern provided by the leveling system rather than creating improvised combinations.
Drive Onto Blocks Slowly
Avoid using excessive throttle.
Let the tire climb smoothly without spinning.
Fast impacts can move the stack, break tabs, or create sudden loading on the upper blocks.
Inspect Blocks Before Every Setup
A five-second check is worthwhile.
Look at the edges, locking tabs, top surface, and reinforcing ribs underneath.
Retire blocks that show structural damage.
Store Them Away From Constant Sunlight
Your leveling blocks do not need to remain beside the RV all year.
Store them inside a compartment, garage, tote, or another protected location when not being used.
Keeping them away from unnecessary sunlight and weather exposure can help reduce long-term deterioration.
Leveling Blocks vs. Jack Pads: What Is the Difference?
Leveling blocks and jack pads solve related problems, but they do different jobs.
Leveling blocks primarily help raise one or more tires to correct an uneven campsite.
Jack pads increase the contact area beneath a jack.
That wider footprint helps distribute the jack’s load and can reduce sinking into dirt, asphalt, or soft ground.
You might use both during the same setup.
For example, leveling blocks may sit beneath the low-side trailer tires while a wider pad supports the tongue jack.
Do not automatically use one product as a substitute for another.
Check what the manufacturer intended that product to support.
Do Leveling Blocks Wear Out?
Yes, leveling blocks can wear out even when they never suffer one major accident.
Every campsite adds another loading cycle.
Over time, durability depends on:
- RV weight.
- Camping frequency.
- Ground conditions.
- Plastic quality.
- Sun exposure.
- Temperature changes.
- Storage conditions.
- Impact damage.
- Stacking habits.
There is no useful universal replacement interval.
One owner might use the same blocks for years. Another might damage a new block on the first trip by placing it over a sharp rock.
Condition matters more than age alone.
When Should You Replace RV Leveling Blocks?
Do not wait for a leveling block to break into several pieces before replacing it. Structural damage is usually enough reason to remove that block from your setup.
Replace a block when you find:
- Visible structural cracks.
- Broken interlocking tabs.
- Missing load-bearing sections.
- Severe warping.
- Deep stress lines.
- Broken reinforcing ribs.
- A surface that no longer sits flat.
- Major damage from driving over an edge.
Small scratches from normal handling are different from structural cracks.
If the damage changes how the block carries weight or fits with other blocks, I would replace it.
Common Leveling Block Mistakes That Increase Cracking Risk
Even strong leveling blocks can have a short life when they are repeatedly used incorrectly.
Common mistakes include:
- Placing blocks directly over sharp gravel.
- Leaving rocks underneath the center.
- Driving onto the stack too quickly.
- Letting tires hang over the edge.
- Building excessively tall stacks.
- Mixing incompatible block systems.
- Using already cracked blocks.
- Allowing blocks to bridge ground depressions.
- Spinning tires while climbing.
- Putting concentrated jack loads on unsuitable blocks.
- Ignoring weight limitations.
- Continuing to use badly warped pieces.
Most of these problems take only a minute to correct.
That minute is much easier than replacing broken blocks during every camping season.
A Better RV Leveling Routine
A consistent routine makes campsite setup easier and protects your equipment. Here is the simple process I recommend when using manual leveling blocks.
- Park and determine which side of the RV is low.
- Estimate the amount of height needed.
- Inspect the ground beside the low-side tires.
- Remove rocks, sticks, and other hard debris.
- Build the leveling ramp on stable ground.
- Confirm the lower blocks sit flat.
- Slowly move the RV onto the blocks.
- Check that the tires are properly positioned.
- Secure the RV using appropriate wheel chocks.
- Adjust front-to-back level using the proper jack or system.
- Deploy stabilizers after leveling when applicable.
- Walk around the RV and inspect every support point.
Give the setup another look after the RV has settled.
Soft soil can compress, especially after rain.
If the blocks begin tilting or sinking, correct the foundation rather than adding more pressure with the jacks.
Final Words
So, why do leveling blocks crack? In most cases, the real problem is concentrated pressure rather than simply the RV being too heavy.
A sharp rock underneath, an edge-loaded tire, an improperly stacked block, or a narrow jack foot can concentrate thousands of pounds into a surprisingly small area.
Start with good ground preparation. Keep your tires properly supported, build stable stacks, drive onto them slowly, and inspect your blocks regularly.
And if you find a structural crack, replace the block. A leveling block is much cheaper than dealing with an unstable RV or damaged leveling equipment.
Related FAQs
Why Do Plastic RV Leveling Blocks Break?
Plastic RV leveling blocks usually break because of uneven ground, concentrated loads, poor tire placement, overloading, impact, or material deterioration. A sharp stone underneath can make even a strong block flex enough to crack.
Can Leveling Blocks Break Under a Travel Trailer?
Yes. Travel trailer leveling blocks can break if they are overloaded, poorly supported, incorrectly stacked, or placed beneath a tire near the edge. Correct placement and properly rated blocks greatly reduce the risk.
Can You Use Leveling Blocks on Gravel?
Yes, you can use leveling blocks on gravel, but prepare the surface first. Remove large or sharp stones and create a reasonably flat base so the blocks receive even support underneath.
Can You Use Leveling Blocks on Concrete?
Yes. Concrete generally provides a firm, flat surface for leveling blocks. However, check for broken concrete edges or debris and make sure the blocks cannot slide while you drive onto them.
Can Leveling Blocks Sink Into the Ground?
Yes. Leveling blocks can sink into soft dirt, wet grass, sand, or recently saturated campsites. A wider base or suitable ground pad can help spread the load and reduce sinking.
Should Leveling Blocks Go Under Both Tires?
That depends on the RV and the amount of leveling required. When raising one side, the required tires on that side should be properly supported according to your leveling system and RV configuration.
Can You Stack Different Leveling Blocks Together?
It is generally better to use compatible blocks from the same system. Different shapes may not interlock correctly, which can create unstable gaps, movement, or concentrated loads between layers.
How Many Leveling Blocks Should I Carry?
The right number depends on your RV and camping conditions. Carry enough to create the manufacturer-approved leveling height while still having a few spare pieces for difficult or uneven campsites.
Are Rubber Leveling Blocks Better Than Plastic?
Rubber pads resist cracking and offer good grip, but they may not provide the same adjustable height as stackable plastic blocks. The better option depends on whether you need height, jack support, ground protection, or all three.
Can I Put Wood Under RV Leveling Blocks?
A flat, strong piece of wood can sometimes provide additional ground support, but it must remain stable and properly sized. Avoid rotten, warped, cracked, or narrow pieces that could create another uneven pressure point.
Can Leveling Blocks Damage RV Tires?
Poorly positioned leveling blocks could place uneven support beneath a tire. Keep the tire properly supported within the usable leveling surface and avoid leaving a significant section of tread hanging over an edge.
Should I Replace a Block With a Small Crack?
If the crack affects the block’s load-bearing structure, I recommend replacing it. Small cosmetic scratches are usually different, but a true structural crack can grow when the block is loaded again.

Scott Miller shares real-world RV road trip insights built from years of traveling open highways and backroads. He covers route planning, campground choices, and travel gear with a practical mindset. His content is written for RVers who value reliability over trends.